- Introduction to WorkXpress
- Building Your Application
- Examples and Best Practices
- Technical Manual
| The first step is to create the appropriate tables and fields. First, let’s create an Invoice table. Click the “Create a Table” tile in the toolbar, and follow the wizard. Select a name. | 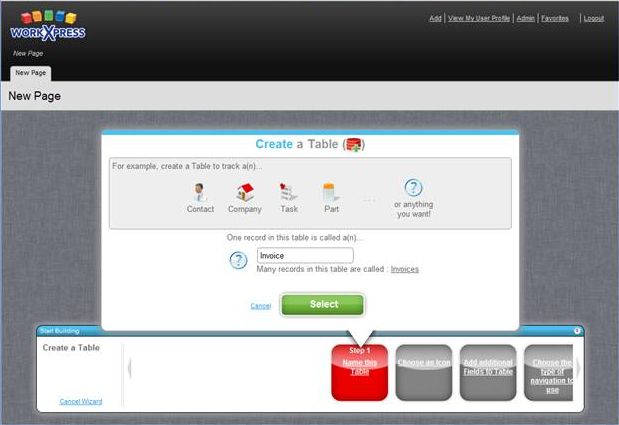 |
| And an icon for the table, and create some of the fields you’ll want on the table. I’d suggest creating at least a Number field (of type autonumber), a Total field (of type currency and a Date field (of type date). |  |
| Next, create another table for the Invoice’s line items. I called mine “Line Item”. You’ll need fields to store a description (of type long text), unit price (of type currency), quantity (of type number) and extended price (of type currency). You’ll also need a selection field to pick the invoice that the line item is attached to. When creating the selection field, make sure to have the field manage the relationship from the line item to the selected invoice (if no relationship yet exists, create one). | 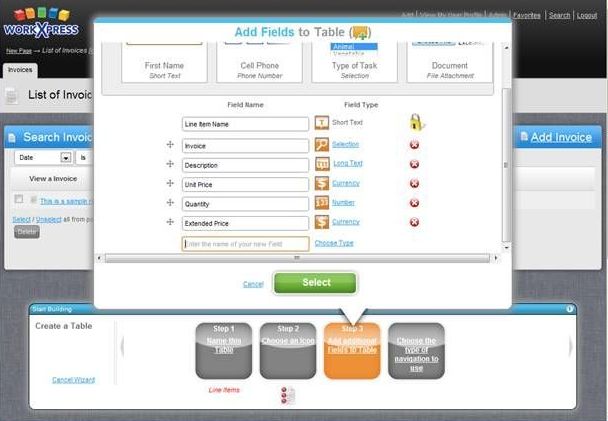 |
| Now that we have the invoice and line item tables, and a relationship that connects them, we’re ready to get to work on the interface. We need to create a list on the invoice pages to show the related line items. Bring up the Add Invoice page, remove the invoice name, number, and total fields, then click to create a new form. Choose to create a list, and on the confirmation page, be sure to disable all the list automation. | 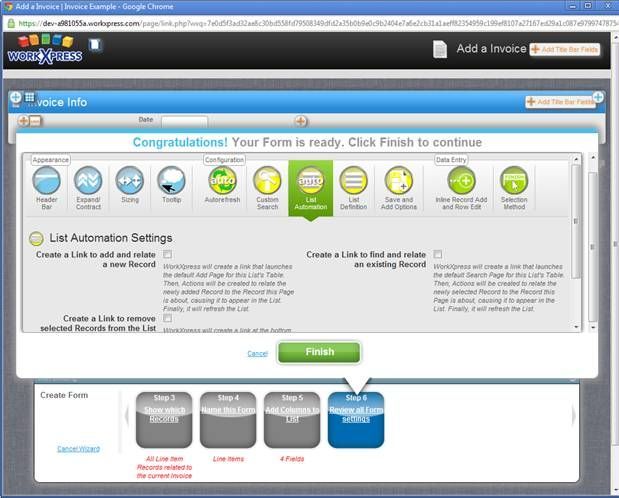 |
| Also, enable inline add and edit. | 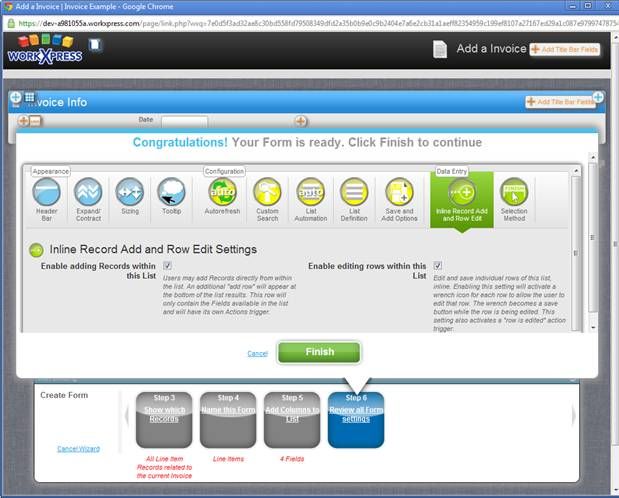 |
| Now, let’s start to set up the automation to calculate the financial numbers for the invoice. First, we’re going to calculate extended price based on quantity and unit price. In order to do this, first, make extended price view only (since we’re calculating it based on other data, we don’t want people to enter their own numbers for extended price). | 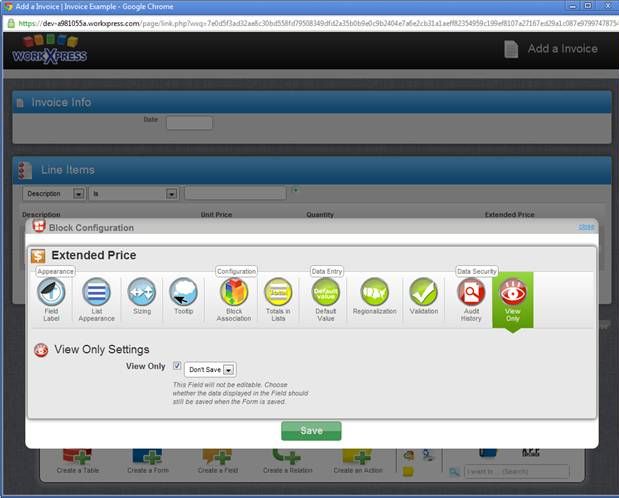 |
| Now, bring up the automation for when a row is added to the list. Drag a set field value action onto the field save trigger for the unit price field. | 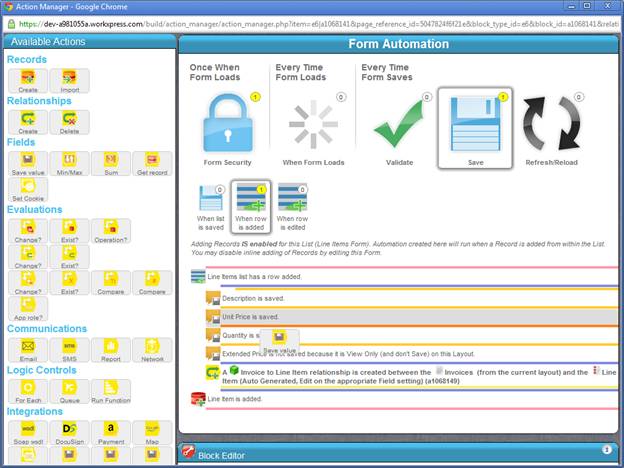 |
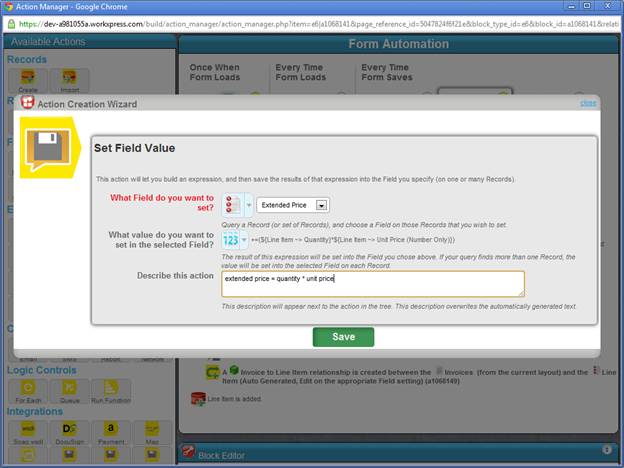
| Configure the action to set the extended price field. For the expression, use the Expression Builder arithmetic function to build the expression +=(${quantity} * ${unit price (number only)}) | 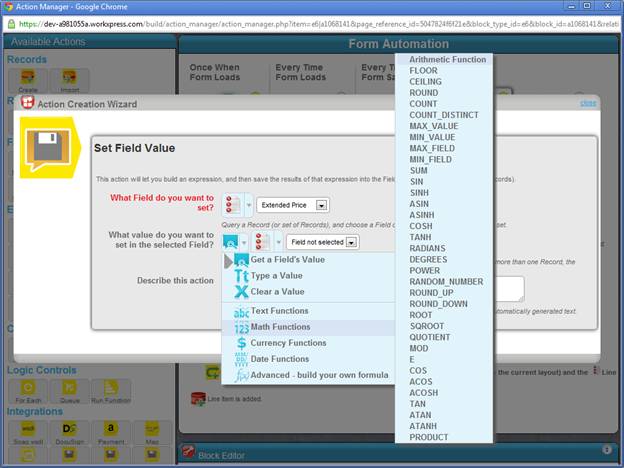 |
 |
|
 |
|
| Now, we’re going to make this automation a bit more efficient by only executing it if a value changed. Grab a field changed evaluation and place it just before the action you just created. Select the unit price field, and have it execute when any change happens. | 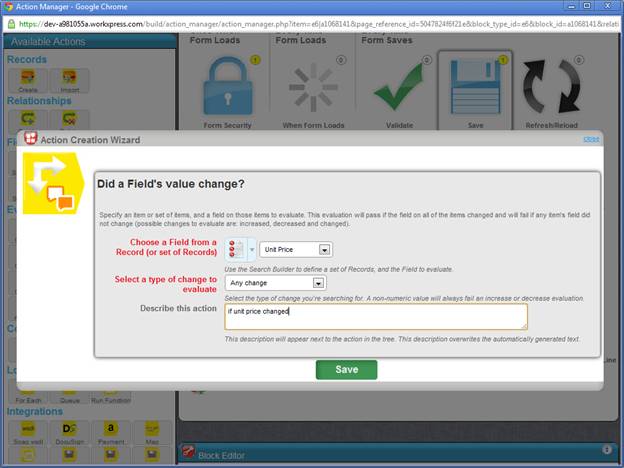 |
| Now expand the evaluation and place your previous action inside the “if true” branch. | 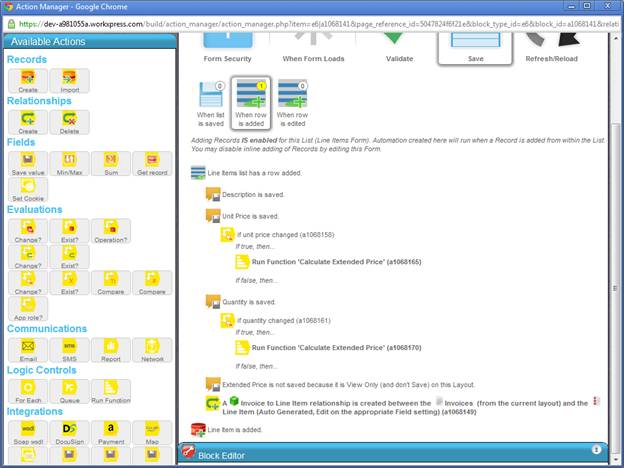 |
| The next step is to put the same automation on the quantity field. To reduce maintenance, it’s best practice to use a function for this, rather than replicating the same automation again. Grab a function from the palette and place it inside the “if true” branch of the evaluation, just before the action to update extended price. Create a new function for calculating the line item extended price. | 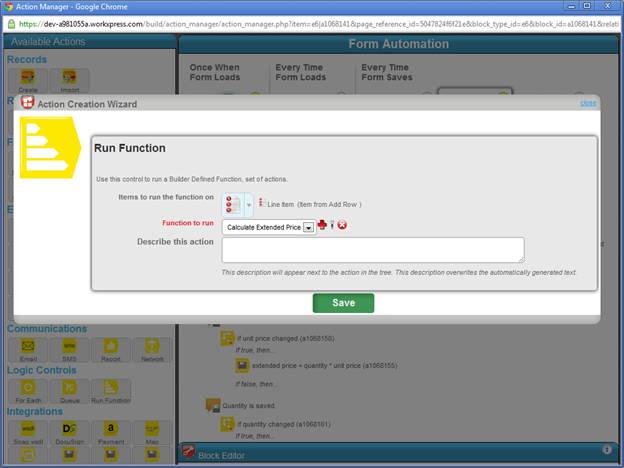 |
| Drag your action that updated the extended price inside your new function. Now, replicate this same automation on the quantity field: add an evaluation to check if the quantity field changed, then place another function that runs the same function inside the “if true” branch of the evaluation. Your action tree for the list’s inline record add should now look like this: | |
| That completes the automation for calculating a line item extended price. Now let’s calculate the total price on the invoice. To do this, we’ll create a new function on the invoice table to calculate total price. Exit this Action Manager and bring up the actions that occur when you submit the page form. Drag a new function action on the blue page save automation trigger. Create a new function on the invoice table for calculating the invoice total price. Inside this new function, place a new field save action. Have it set the total price field, and for the expression, choose to use the sum function. | 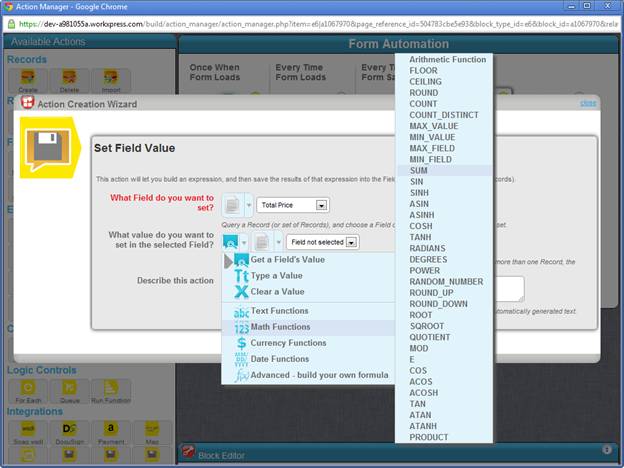 |
| Inside the Expression Builder function configuration, choose to sum the extended price filed on the related line items. | 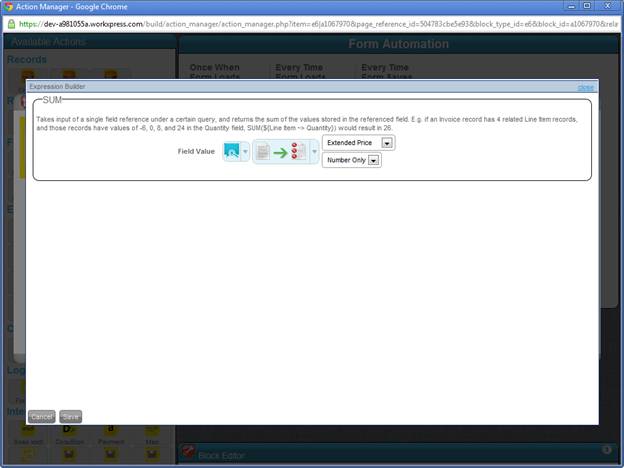 |
| Your action should look like this: | 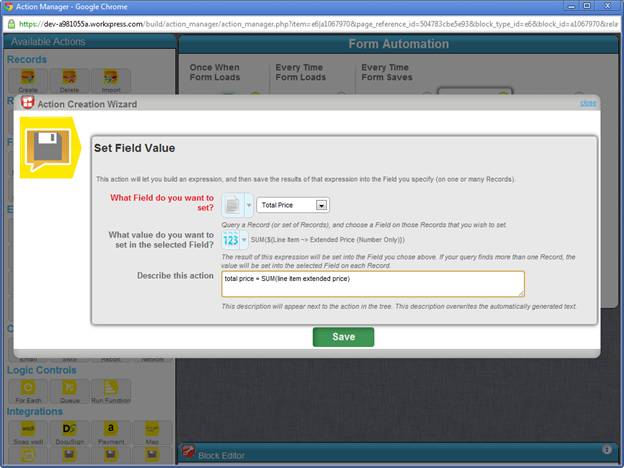 |
| Your action tree should now look like this: | 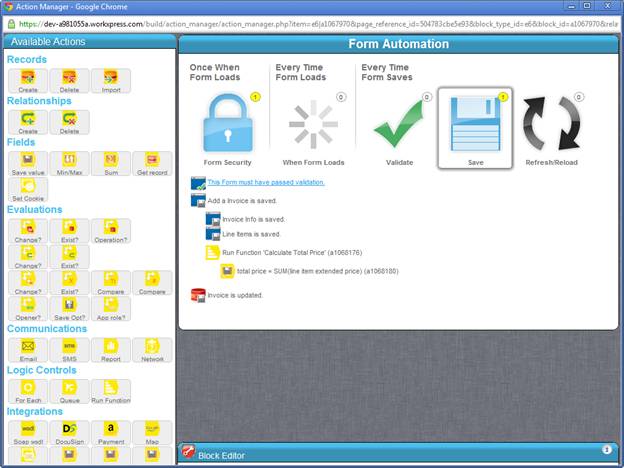 |
| On this page, we really only care about calculating the total price when the invoice is added (since if the page doesn’t get added, the record never exists anyway). So we’re done with financial automation on this page. The last thing we want to do here is show the subtotal of the line items as they’re added. To do this, edit the extended price field and enable subtotaling. Choose to sum to 2 decimal places. | 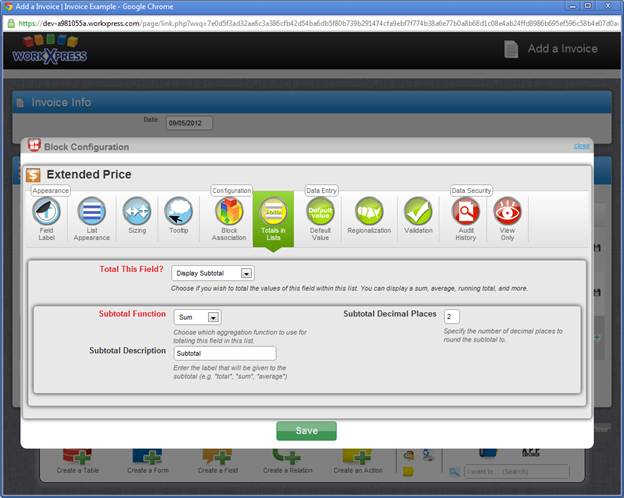 |
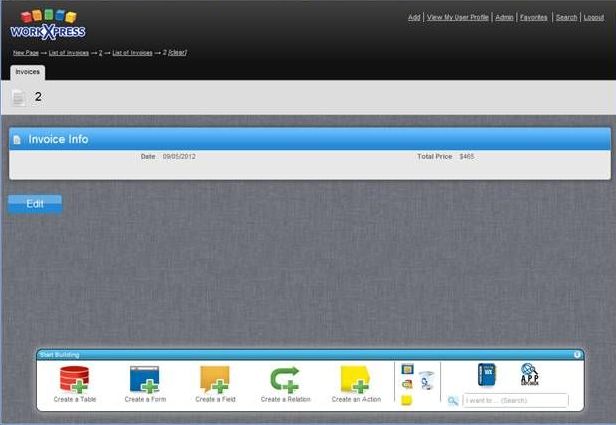
| Your page should now look like this: | 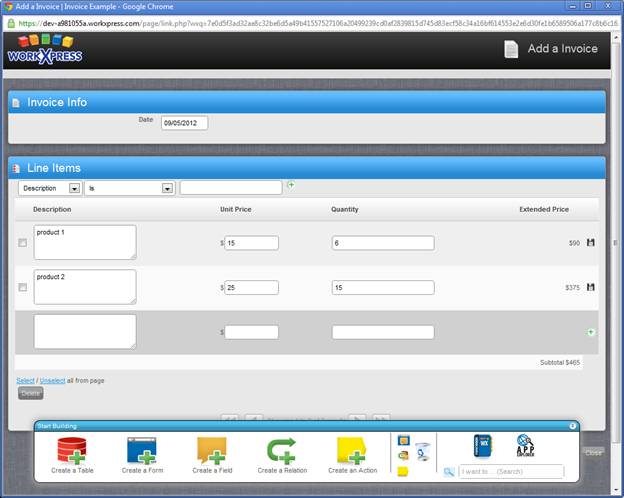 |
| One more thing before we leave: remember the number field we created on the invoice? We need to configure that field to automatically increment whenever a new invoice gets created. To do this, bring up the action manager for the page. Drag a new operation evaluation onto the red record updated automation trigger. | 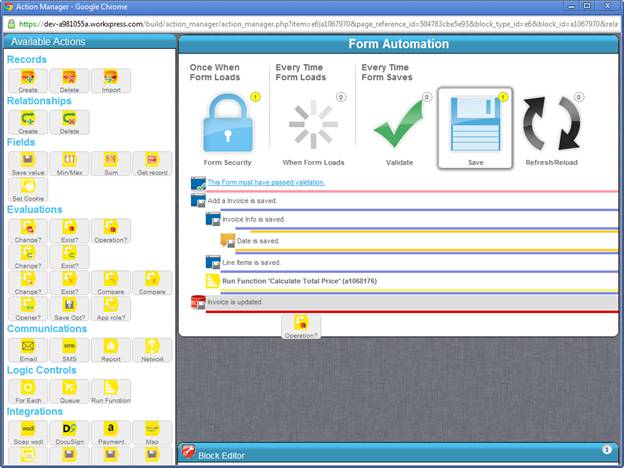 |
| Choose to detect the add operation. Inside the “if true” branch, drag a new field save action. Set the number field with the static value 1 (or any other non-empty value). | 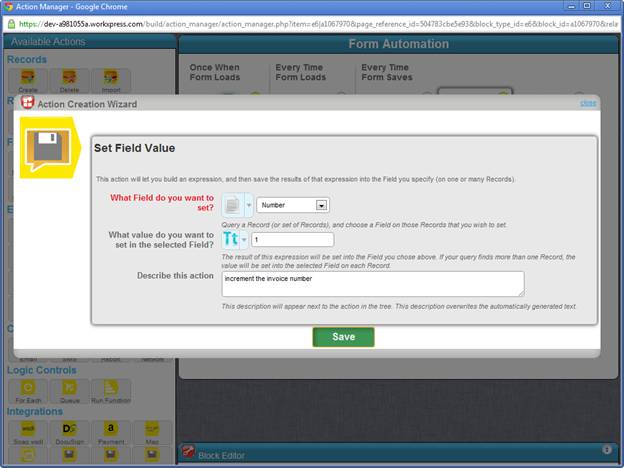 |
| Your add invoice page’s automation should now look like this: | 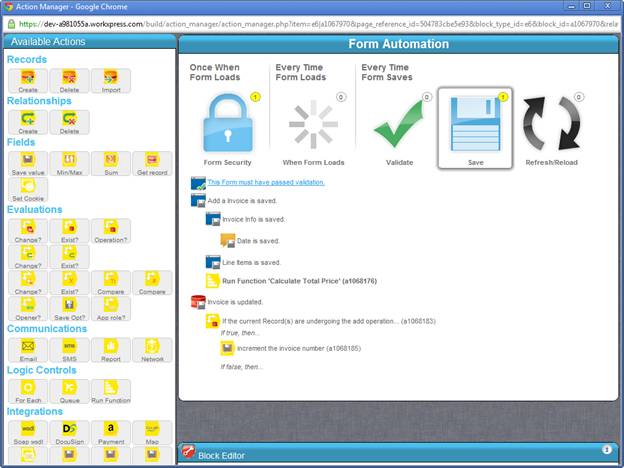 |
| It’s important that all integral tables have names, so after we set the invoice number, let’s name the invoice according to its invoice number. To do this, after the evaluation to check for the add operation, add another field save action. Choose to set the invoice name field. In the Expression Builder, choose a concat) function. Build the parameters as shown in the screenshot. | 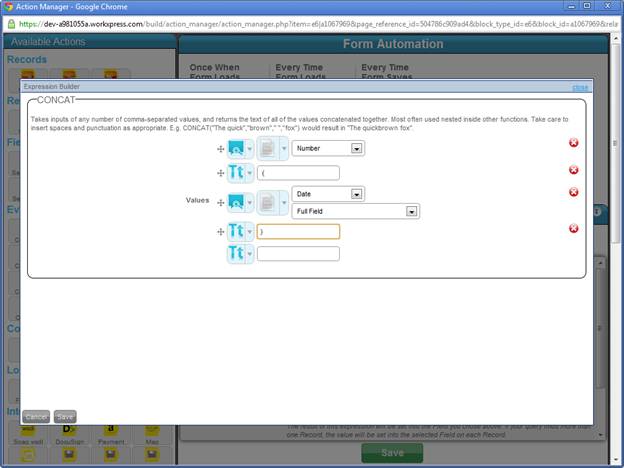 |
| Your automation should now look like this: | 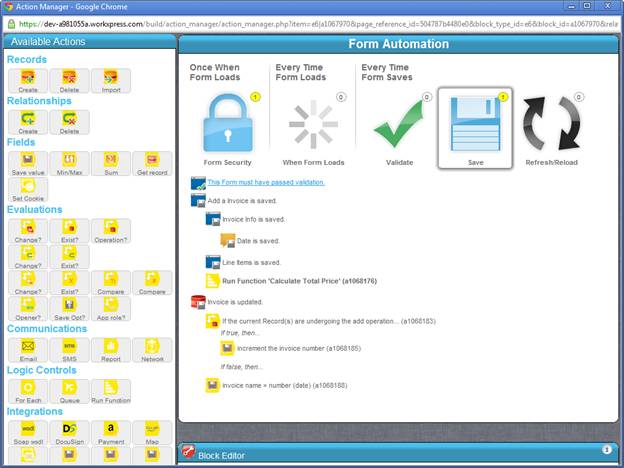 |
| That completes the add invoice page. |
| Let’s now go to the view page. Click add and view. | |
| Remove the invoice name and number fields from the interface. Set the total field to be view-only. | 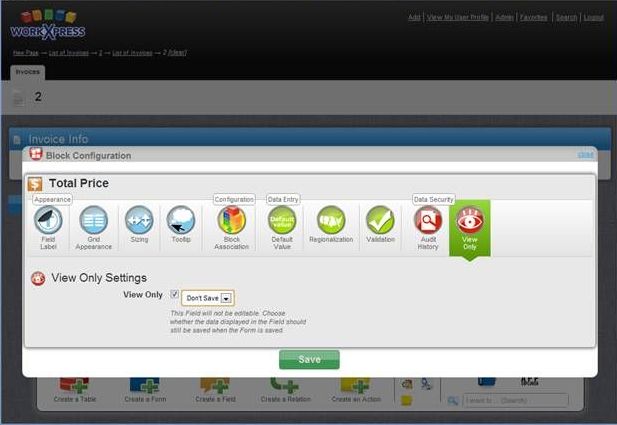 |
 |
|
| Recreate the same list you put on the add page. You’ll notice that the Edit button is below the list, when really it applies just to the invoice information. Let’s address this. On the page settings, under Save and Add Options, disable the Enable Page Save/Add Controls setting. | 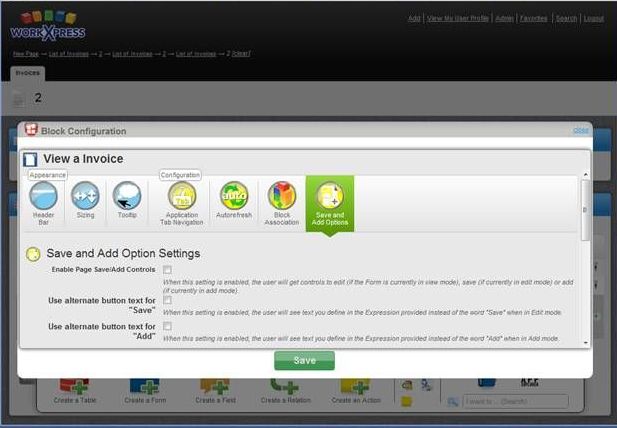 |
| Now, edit the field grid’s settings, and enable Form Setting - Allow Form to Be Saved Independently of the Pageindependent save controls. | 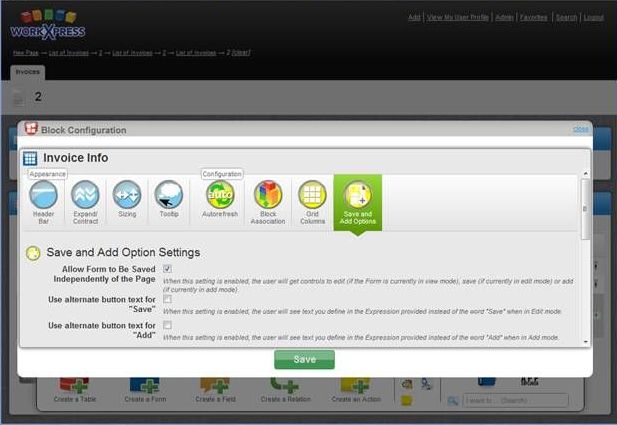 |
| Now, click to add the existing field “Delete Line Item” (attached to the line item table) to the mass action area of the list. Your page should now look like this: | 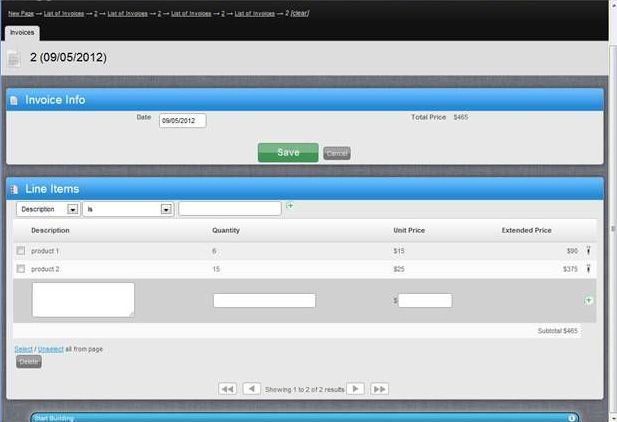 |
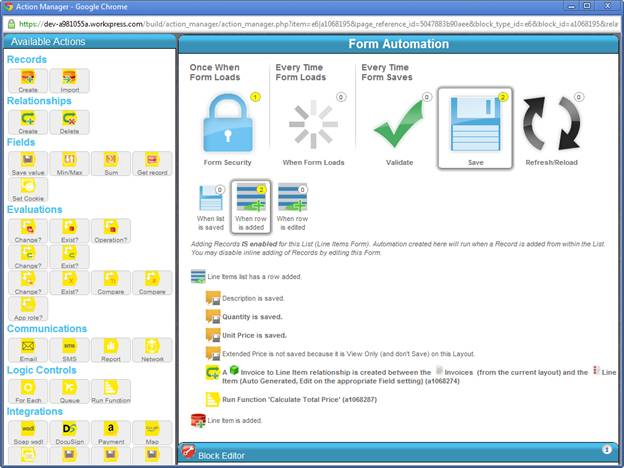
| Now let’s set up the automation we need on this page. The automation to calculate line item extended prices was global to the fields, so we don’t need to replicate it. The automation to calculate the total price, though, was not. We do have to place the appropriate automation to calculate total price anytime it could potentially change. The three places on this page when total price could potentially change are: when a line item is added, when a line item is edited, and when a line item is deleted. We need to execute the function to recalculate the total price in each of those places. We’ll start with when a row is added. Bring up the automation for the inline add row of the list. Drop a function action on the blue drop point for when the row is added. The default context here is the row that we’re adding, so we need to change the context to the invoice. Use the record from the page query starting point (this will be the invoice record). Now select the function you previously built to calculate the invoice’s total. |  |
 |
|
| Similarly, go to the automation for when a row is edited and add the same function call there. |  |
| Now, bring up the automation for the delete button you put in the list. Add a function action to recalculate the invoice total there as well. Make sure you place the action after the action that deletes the selected line items. | 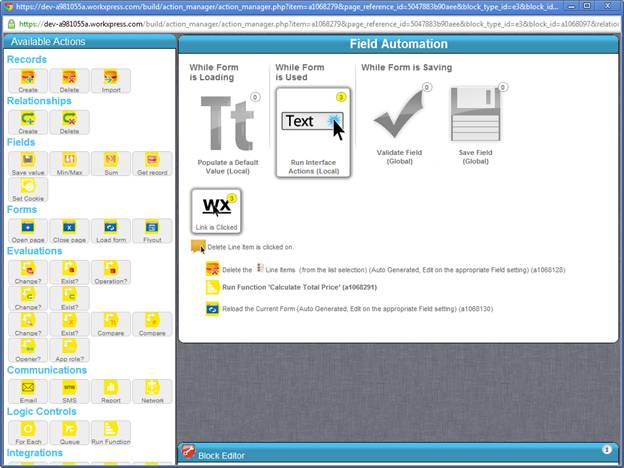 |
| This completes the basics of setting up an invoice table. |  |
| Now, let’s make a button to print the invoice to a PDF. First, make a new WorkXpress link field in the header of the page. Choose image only and select the printer icon. Bring up the tooltip setting, and type in “Print Invoice”. | 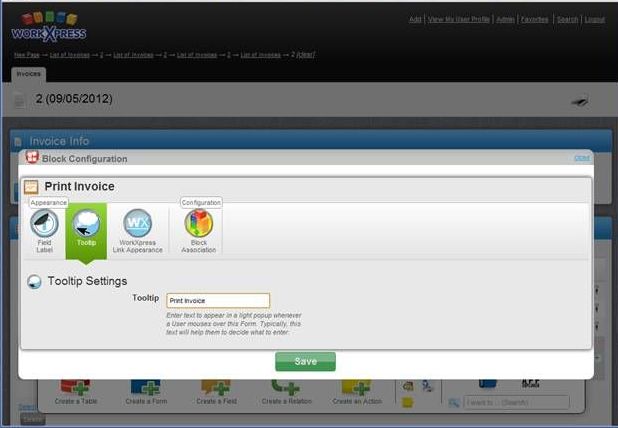 |
 |
| The next part is to create a report to generate the invoice document you wish to print. Get to the add report page. Make sure to choose yes for the application role. |  |
| For the report’s query, choose to start from a future record of type invoice. | 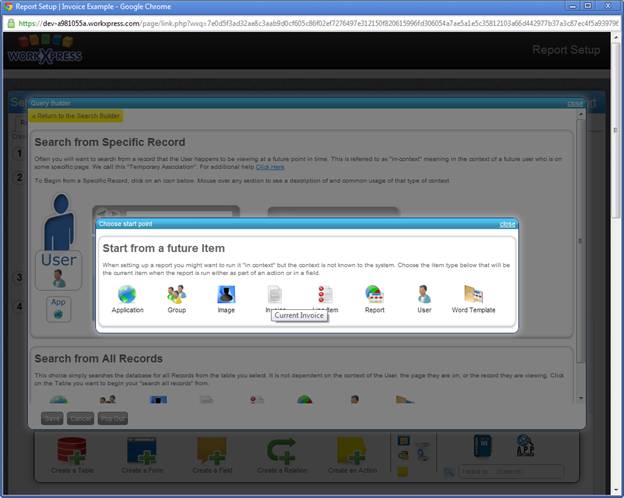 |
| Now, build the content that you want your report to have. If you’re good with HTML, you can use the HTML builder to build your own custom HTML. This file contains a good starting point for this HTML.INSERT TEXT FILE If you’re not as skilled in HTML, you can use the rich text controls to build your content. | 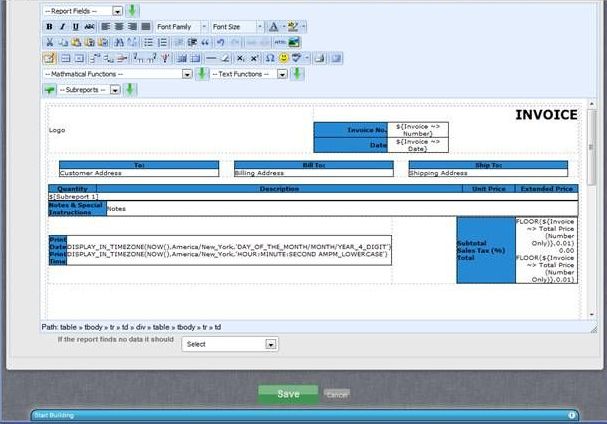 |
| Now, place your cursor wherever you want the line items to appear and click the green plus icon to create a new subreport. | 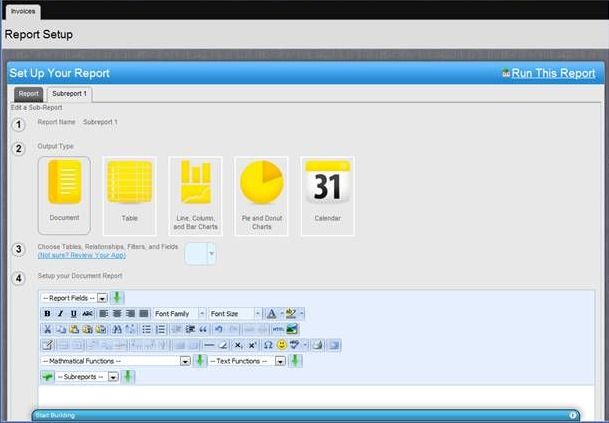 |
| In the subreport, choose a future invoice for your query starting point. From that starting point, navigate across the relationship you previously built to the line item table. Select the data you wish to display, and save your query. | 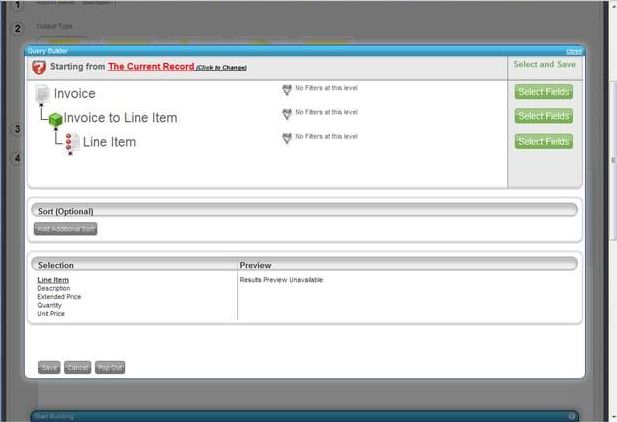 |
| For the content, if you’re using the provided HTML, here’s a good starting point for the line item HTML:(insert .txt file) Save your report. |


