- Introduction to WorkXpress
- Building Your Application
- Examples and Best Practices
- Technical Manual
All systems administration tasks are performed within the WorkXpress Cloud Management Portal at https://projects.workxpress.com and are split into two groups: Application Management and Cloud Management.
Application Management tasks will all be performed under the Applications tab. Commonly referred to as the Software Development Lifecycle (or SDLC), applications are typically created in a development environment, released to a testing environment, and then used in a production environment. Below we will cover how this made easier with WorkXpress.
You want to start here whenever you begin a new application! To create a brand new, blank application, click the “Create Application” button on the right side of the Applications tab.
You will need to enter a name, select a cloud to host on, and agree to the Terms of Service. For now, we'll assume you have a cloud to load the application on, and cover creating your own clouds later.
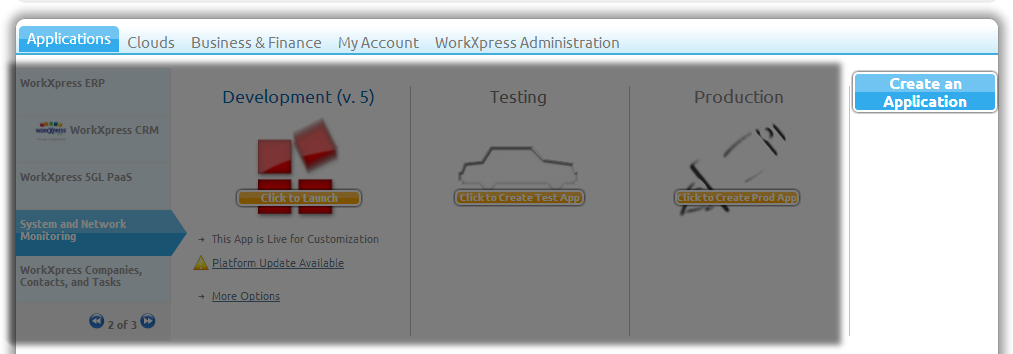
Once your new application is setup on the cloud, it will look similar to this:
To launch your application and begin building, click the red blocks in the center, marked “Click to Launch” under the Development section. This will open your application in a popup window and allow you to work on your application.
Once you've spend some time building your application, you will be ready to take it to the next level; Testing! Testing installations share the same Application DNA (Tables, Fields, Forms, Relation Tables, and Actions) as your development installation, but it does not share the same User DNA (Contact, Account, Task, Item records). This means that when you create a new testing installation it won't have any user data, and when you update a testing installation the user data you've created will remain in tact. Testing installations typically have a subset of the data on a production installation; enough so the functions of the application can be tested.
Testing installations also do not have the build tools enabled. The purpose of a testing installation is to have an installation of your application that mimics what it will be like when end Users use it, before updating their actual production installation so you can test out changes and updates you've made without impacting Users if you find issues, or what to make changes to what you've done.
It's best practice to update your testing installation with any changes to your application from Development, and test the changes there before updating your Production installation.
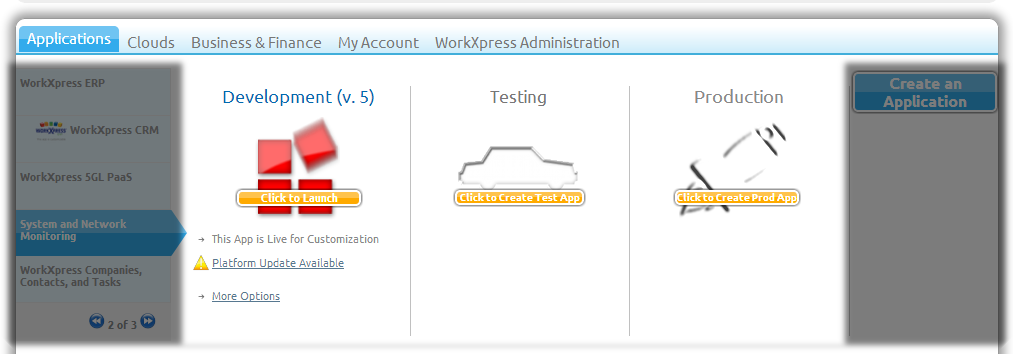
You can create a testing installation by simply clicking the outlined car labeled “Click to Create Test App” in the center of the Testing section. This will launch a screen that asks you to describe the changes you made in Development, asks for where to host the testing application, which for now we will assume you will do on an existing Cloud Server, and to accept the Terms of Service.
When a new testing application is created, the following steps happen :
Once the testing Application is installed and established, the interface will show a filled in, yellow car under the Testing section. There will also be a large green arrow between the development and testing applications. This button, labeled “Update Testing from Build” will allow you to describe the changes you've made in the current version of Development, and then it will release a version of the Development Application and update the testing application with these changes!
When an existing testing application is updated this way, the following steps happen :
If you would like to release a version of your Development environment without updating Testing, you can do so under the “More Options” menu, by selecting “Version History”. Then click “Release a Version” in the top right of this screen. Once this version is released, you will have the option to update Testing, or Production installations associated with it at your leisure.
Once you've updated your testing application, and tested it, you will be ready to update the application end users will actually use: Production! Like testing installations, production installations share the same Application DNA (Tables, Fields, Forms, Relation Tables, and Actions) as your development and testing installation, but it does not share the same User DNA (Contact, Account, Task, Item records). This means that when you create a new production installation it won't have any user data, and when you update a production installation the user data you've created will remain in tact. The data created in production installations is typically business critical and should be backed up regularly!
Production installations do not have the build tools enabled. The purpose of a production installation is to have an installation of your application that the end users use.
You can create a production installation by simply clicking the outlined rocket ship labeled “Click to Create Prod App” in the center of the Production section. This will launch a screen that asks for where to host the production application, which for now we will assume you will do on an existing Cloud Server, and to accept the Terms of Service.
When a new production installation is created, the following steps happen :
Once the production application is installed and established, the interface will show a filled in, green rocket ship under the Production section. There will also be a large green arrow between the testing and production applications. This button, labeled “Update Prod from Testing” will allow you to update the production application to the same release that the testing application is currently using!
The application list will show you all of the applications you have access to. Click on an application to update the application details area in the center with the details of that application.
Note that what your account surpasses 5 applications there are controls at the bottom of the application list to navigate through pages of applications.
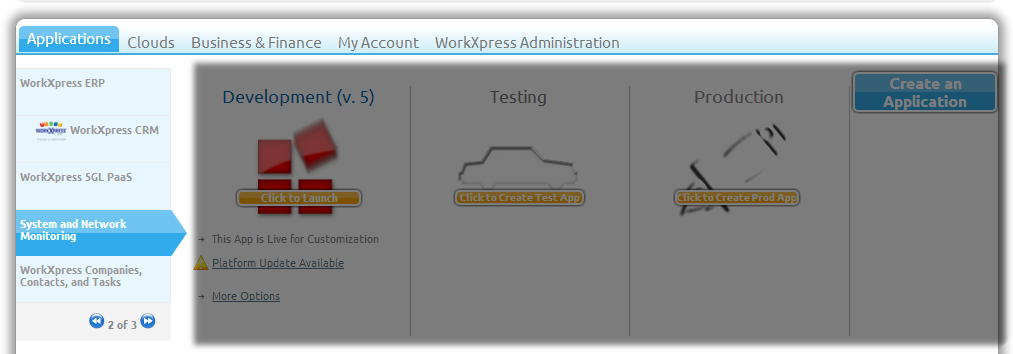
Under each section, Development, Testing and Production, you'll find a series of indicators. These indicators will show you status messages when the installations are actively undergoing operations. They will also show you things like the availability of new platform updates, or new available versions in the case of testing and production installations.
A platform update, under a development installation, is an update to the underlying platform that your application is built on. All of the wizards that help you create blocks, the code for creating those blocks and managing the database structure, the available types of Fields, types of Forms, types of Actions, etc. are all part of the platform. As the developers at WorkXpress add available features to the platform, and fix reported problems, they will make new versions of the platform available to the builder community. When they release new platform versions they also describe what they have done in release notes, and these are made available when you click “Platform Update Available” so you can see what's new in this version. Updating your platform is optional, and up to you to schedule. Only development installations can be updated with new platform updates.
While the platform is updating for a development installation it will be unavailable.
When new releases are made from development installations, there will also be an indicator under the testing and production sections that indicate an update is available. If more than one development release has been made since the last time you updated testing or production, you will be given the option of which development release to update to when you click “Application Update Available”.
Under the update indicators is a link to additional operations you may want to perform on an installation.
For a development installation, the following options will be available:
For a production installation, the following options will be available:
Testing installations have matching lists of options with one exception: Usage. Since testing installations aren't typically billed for user usage there is little reason to capture and show the user count information for testing installations.
Provisioning, configuring and co-locating servers to host web based applications can be just as time consuming as building the application to run on these servers! With WorkXpress, we allow you to setup a server in the Cloud (Public or Private) in a matter of a few minutes, ready to host your WorkXpress based applications!
The “Clouds” Tab of the platform is where you will go to manage your clouds. On the right you'll see a “Create a Cloud” button, which will ask you just a few questions, and get the cloud setup for you.
WorkXpress has partnered with Amazon on their EC2 platform to provide clouds on their Public Cloud system. Provision a new Amazon EC2 based Cloud in just a few clicks, and a few minutes wait time.
More public cloud partners are on the horizon. It is our mission to give our customers ultimate flexibility and choice with where to host their applications; this includes which Public Cloud offerings are available. Each partner's offering is unique, and so the maintenance involved in maintaining these partnerships has us adding partners slower then we'd like. If you have a preferred partner for us to integrate with, feel free to contact support@workxpress.com.
If you would prefer to host your cloud to host WorkXpress applications behind your own firewall on your network, that is an option as well! Choose Private Cloud, download and install the stack as an appliance in your OVF compliant virtualized environment, and be up and running quickly.
For more information about setting up a Private cloud, visit our Private Cloud installation guide.
For each cloud, you can expand it's processor and RAM, and/or storage capacity with the click of a button. You can also see application and user counts on each cloud. You can check the monitors to ensure the cloud is running smoothly, or read the graphs of CPU Usage, RAM usage and hard drive usage to ensure you're data is not outpacing your available storage space.
The Clouds tab is your data center monitor for the clouds that power your WorkXpress applications.
WorkXpress provides a variety of tools for maintaining your clouds and each is described below.
Use performance graphs to view a history of key performance metrics of your cloud server and the underlying technology stack of WorkXpress. These tools chart many aspects of processor utilization, different types of memory utilization, database performance, user activity, open threads, and much more. These graphs are accessed from the Operations and Monitoring section of a Cloud's details.
The illustration below shows some examples of actual WorkXpress performance graphs.

Monitors are slightly different from, but related to, performance graphs above. Each cloud is setup with the monitors to track CPU usage, hard drive usage, web and database server health, and memory cache health. In the event that any of the metrics tracked by these monitors crosses a warning threshold, email is sent to the warning contact(s) and where possible self-healing action is taken. In the event that any of these metrics crosses a critical threshold, email is sent to the critical contact(s) for this cloud and where possible a more drastic self-healing action is taken.
For example, if a monitor finds that the web server is not running it will, at the warning level, attempt to restart the web server. If successful it will email the warning contact(s) that there was an issue, but it has been resolved. If it fails to restart the service successfully it will retry up to a configurable number of times and if unsuccessful it will escalate to the critical level, and email the critical contact(s) with an indication of what it did to try and resolve the issue, and that it was unable to. At that point a technician will need to access the cloud directly and resolve the issue.
You can setup your own monitors to keep an eye on critical variables and systems. For example, you may be sensitive to hard drive usage and may want to alert at 50%. Or, you may have a critical integration with a 3rd party webservice, and you want to regularly ping that web service to make sure it is online, and if not, you may want to have a text message sent to your on-call administrator.
Disaster Recovery is made easy using the WorKXpress Cloud Management Portal. In fact, it is merely the application of the same techniques used to create infrastructure, to install software applications, and to restore data. The exact steps to accomplish disaster recovery are:
Access to the WorkXpress Cloud Management Portal is managed through Users, attached to an Account. When you sign up for WorkXpress an Account is made for your company, and a User is created based on the personal information filled out on the form. This User is then assigned to the Account, and a new Build application is also spun up attached to this Account, to get you started.
You can access the Account details, and make changes to the account name, and contact details by clicking the “My Account” tab in the portal. This tab will show you summary information about your Account including the number of Users on the Account, your current wallet details, and more.
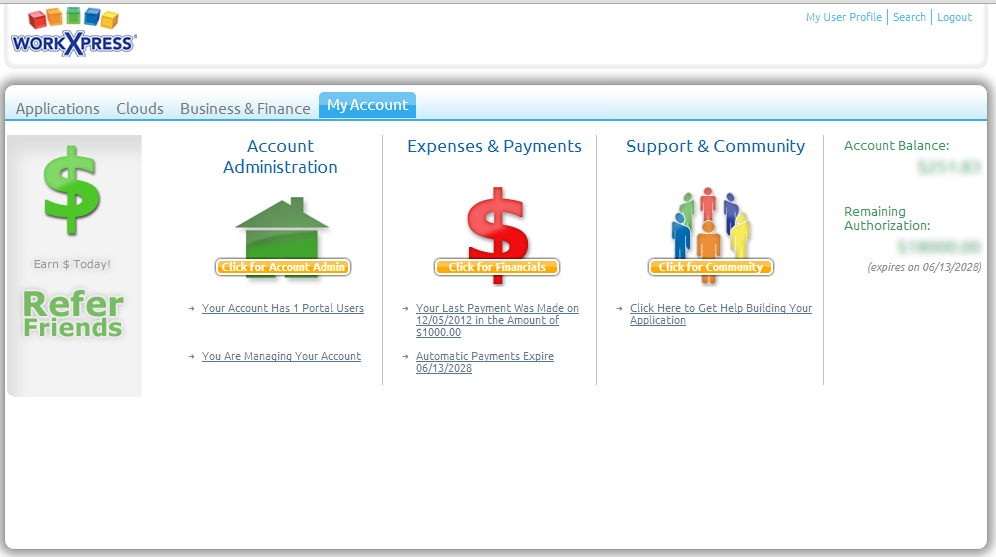
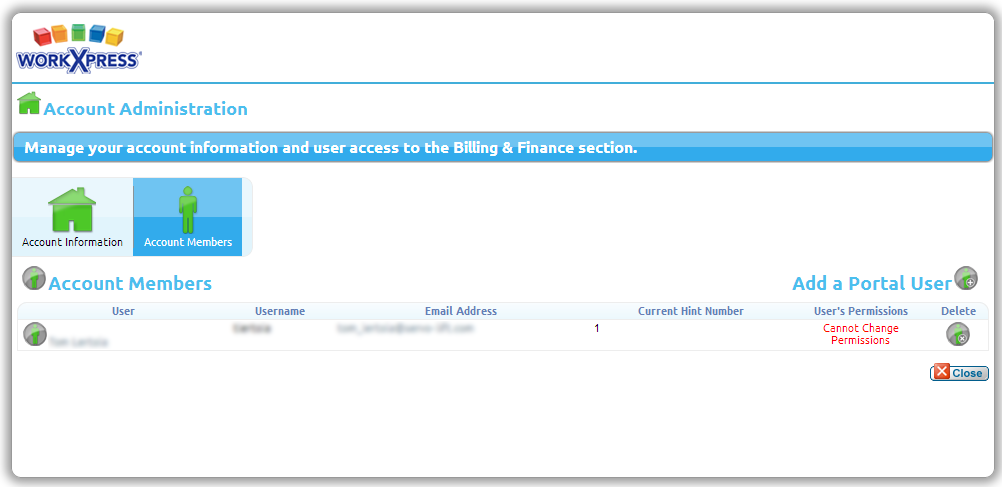
To Access account level details click “Account Administration” above the first tile. That will bring you to a screen like the below, and allow you to update existing information about your Account.

If you click the “Account Members” button, it will show you a list of all of the Users who have access to this account. You can add users here. These users will have full access to each of the applications and clouds attached to the account.