Avatar
The avatar field is used to create a unique avatar image. By utilizing a set group of available features.
How to Create - Method 1
Click the

to add a field in your
form.
Choose “New Field”
Select the table you wish to add the field to. Most of the time, this will be the current
table you are on, called the current
context.
Select a field name and click “Choose Type”.
Choose “Avatar” from the list of field types.
You can continue adding fields or click the “Select” button to finish adding.
How to Create - Method 2
This field is able to be placed on a page itself, not as part of a table's records.
Adding the Field
Click the “Fields” button in the left toolbar to expand the list of fields available.
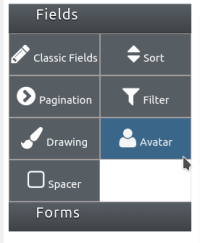
Click on “Avatar”, holding the mouse button down and dragging the filter field onto the page, releasing over the blue border line where the field will be placed.
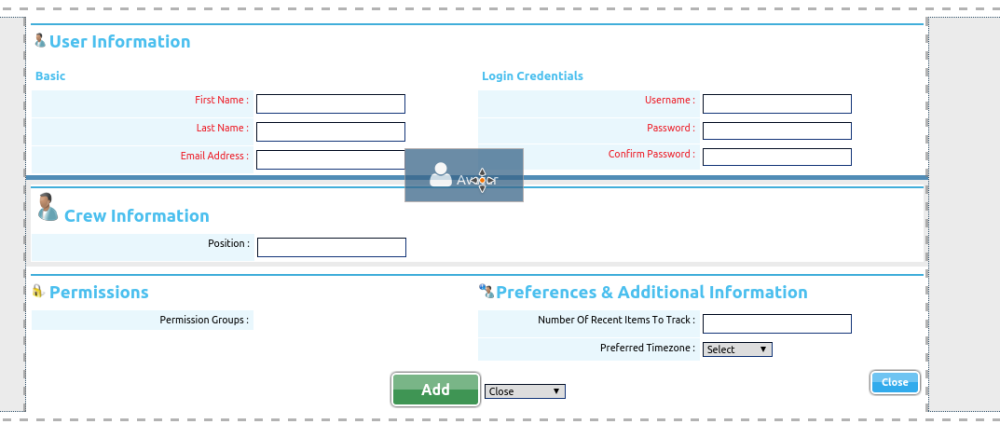
An empty avatar field will appear on the page in the location specified.
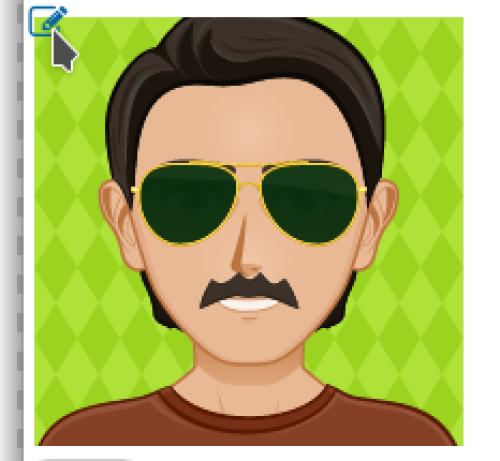
Accessing the Features
When hovering the mouse over the field, an icon containing a blue pencil over a sheet of paper will appear in the top left corner of the field. Click this icon to access the field features as listed below.
Features
Field features can be edited by clicking on the orange field icon  when the presentation layer is displayed.
Field Label
Grid Appearance
List Appearance
Tree Appearance
Sizing
Disabled Pieces
Block Association
Validation
Audit History
View Only
File Access
Field Parts
The Avatar Field has 10 different field parts:
Download
URL - This will be the
URL where the stored image file is found.
Encoded File - A base64 encoded string containing the contents of the stored image. This is cleared after it is saved into an image file.
File name - The file name of the stored image
File size - The size of the stored image in bytes.
Height - The height of the stored image.
Width - The width of the merged image.
Location Type - Will always be empty.
Mime Type - The Internet Media Type, will always be image/png.
Initial State - A collection of all selected features for the avatar including color and positioning data. This will generate the avatar image into the avatar creation interface when the field is being edited.
Gender - If set, which will either be male or female, when the field enters edit mode, it will open the edit avatar interface for that gender, bypassing the gender selection interface.
Using The Field Type
Initialization
When in view mode, the Avatar Field will appear as a previously created avatar, or blank if one has not been created. Then edit or add mode is entered, the Avatar Field will initialize and an interface will appear based on the following criteria:
If there does not currently exist an avatar image, then the Gender Selection Interface will be available
If an avatar image does exist, it will be utilized and the Avatar Creation Interface will be available with that avatar
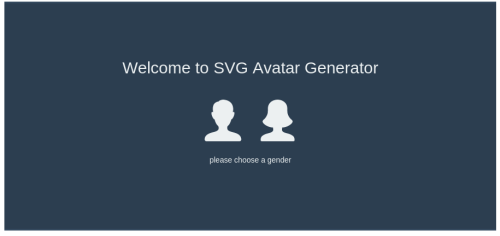 Fig. 1: Gender Selection Interface
|
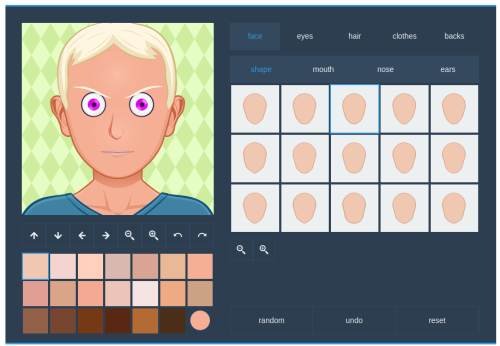 Fig. 2: Avatar Creation Interface
|
On the Gender Selection Interface, there will be a prompt to select either a male avatar or a female avatar. Upon clicking one, the Avatar Creation Interface will be loaded along with the features available for that gender and the default avatar. Gender can also obtained through an existing avatar so the appropriate features will be loaded, allowing for the bypass of the Gender Selection Interface. There are different feature sets for males and females (i.e. you can not give a female a beard).
Avatar Preview
The avatar preview appears in the top left corner of the interface. This shows the image that will be created when the field is saved. Any changes made through the interface will instantly be reflected here.
Body Positioning
Below the Avatar Image is a row of buttons that control the various positioning aspects of the avatar body. Clicking on these options will apply them to the avatar, which will be displayed in the avatar preview. They are, from left to right:

Up - this shifts the avatar body upwards
Down - this shifts the avatar body downwards
Left - this shifts the avatar body to the left
Right - this shifts the avatar body to the right
Zoom Out - this zooms outward on the avatar body
Zoom In - this zooms inward on the avatar body
Tilt Left - this tilts the avatar head to the left
Tilt Right - this tilts the avatar head to the right
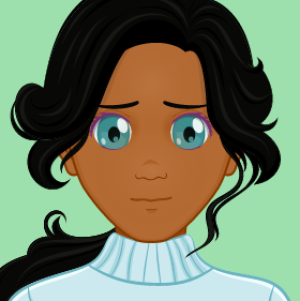 Fig. 3: Avatar body in the default position
|
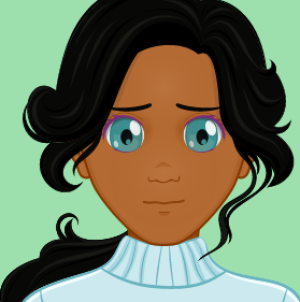 Fig. 4: Avatar body shifted to the right
|
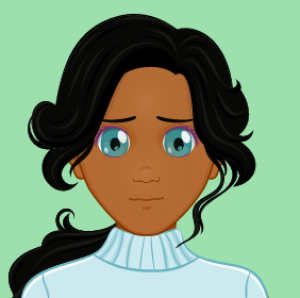 Fig. 5: Avatar body that has been zoomed out
|
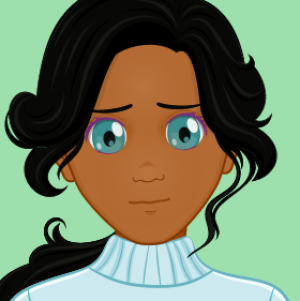 Fig. 6: Avatar body with the head tilted to the left
|
Features
The top right corner contains a row of tabs with a row of subtabs beneath it. These contain all the available features and their options which can be modified on the avatar. Toggling between the tabs and subtabs will show the options for that feature. Clicking on these options will add them to the avatar, which will be displayed in the avatar preview. Only one option per feature can be selected at a time, in which case, a border will appear around that options (blue for males, red for females). An option with a grey background is disabled and cannot be selected.
face
shape - options for the facial shape
mouth - options for the mouth
nose - options for the nose
ears - options for the ear
eyes
eye shape - options for the shape of the eyes
iris - options for the irises
eyebrows - options for the eyebrows
glasses - options for the glasses (optional)
hair
on head - options for the hair (optional)
mustache - options for the mustache (optional, male only)
beard - options for the beard (optional, male only)
clothes
back
 Fig. 7: Avatar features for irises
|
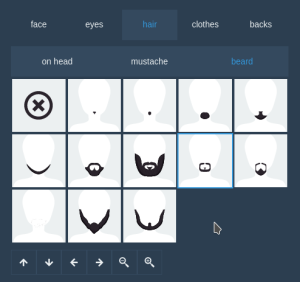 Fig. 8: Avatar features for beards
|
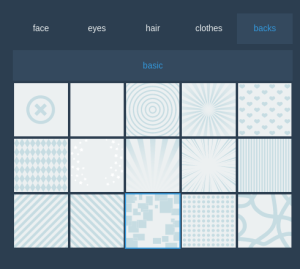 Fig. 9: Avatar features for the backgrounds
|
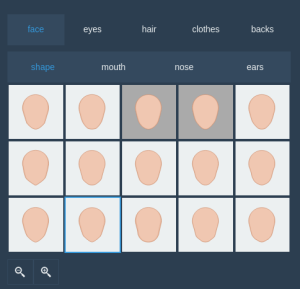 Fig. 10: Avatar features for face shapes with options 3 & 4 disabled
|
Feature Positioning
Below the Features section is a row of buttons that control the various positioning aspects for the currently selected feature. Clicking on these options will apply them to the avatar, which will be displayed in the avatar preview. The options available can be different between features and will include options from the body positioning as well as some new ones. The new options are, from left to right:


Move Closer - moves the two pieces of the feature closer together
Move Apart - moves the two pieces of the feature further apart
Raise Right Eyebrow - sets the eyebrows so that the right one is higher than the left
Raise Left Eyebrow - sets the eyebrows so that the left one is higher than the right
Raise Both Eyebrows - sets the eyebrows so that they are both slanted upwards
Lower Both Eyebrows - sets the eyebrows so that they are both slanted downwards
Remove Eyebrows Style - restores the eyebrows to their default style
 Fig. 11: Avatar with default feature positioning
|
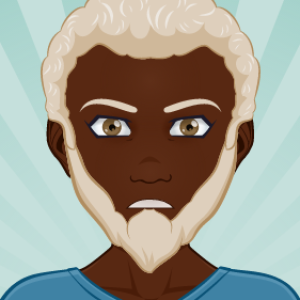 Fig. 12: Avatar with the nose zoomed in on
|
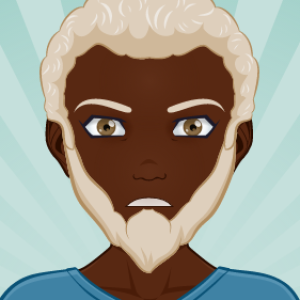 Fig. 13: Avatar with the eyes and eyebrows moved apart
|
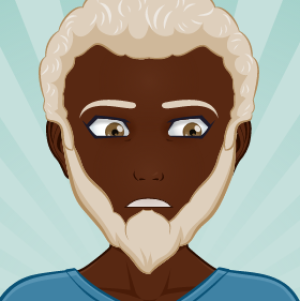 Fig. 14: Avatar with irises moved down and to the right and eyebrows slanted down
|
Color Palette
The bottom left corner contains a color palette for the currently selected feature. Clicking on these options will apply them to the avatar, which will be displayed in the avatar preview. The palette may be different between features, but the final option (being circular in shape) will open a custom color picker where any color can be selected by clicking on the hue displays or typing the color's hexadecimal value. The original color will appear next to the selected color in the bottom left corner and can be clicked to restore that color. The custom color picker will close when the mouse is clicked outside of it.
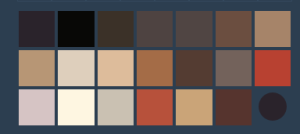 Fig. 15: Color Palette for the hair feature
|
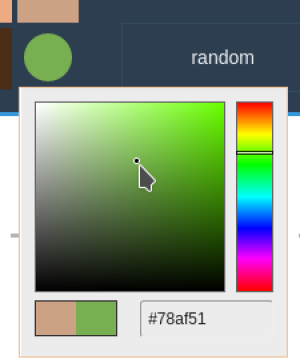 Fig. 16: Custom Color Palette
|
Note: The color for face shape, nose and ears will always be the same. When a color is chosen for one, it is automatically applied to the other two.
There are three buttons in the bottom right corner that provide extra functionality when creating an avatar.

random: This generates a new avatar with a set of completely random features. If a feature is disabled, it will not be available.
undo: This undoes all changes made to the avatar, restoring it to its original state.
reset: This will delete the avatar and bring up the Gender Selection Interface.
 to add a field in your form.
 when the presentation layer is displayed.


