Table of Contents
Drawing
The drawing field is used to for creating an image overtop of an existing image and saving the two merged together into a single image. By utilizing the wPaint plugin, an application developer can draw with their cursor and insert text over top of the displayed image. All images must be in png format.
How to Create - Method 1
- Click the
 to add a field in your form.
 - Choose “New Field”
- Select a field name and click “Choose Type”.
- Choose “Drawing” from the list of field types.
- You can continue adding fields or click the “Select” button to finish adding.
How to Create - Method 2
This field is able to be placed on a page itself, not as part of a table's records.
Adding the Field
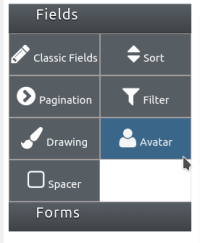
- Click the “Fields” button in the left toolbar to expand the list of fields available.

- Click on “Drawing”, holding the mouse button down and dragging the filter field onto the page, releasing over the grey shadow where the field will be placed.

- An empty drawing field will appear on the page in the location specified.
Accessing the Features
When hovering the mouse over the field, an icon containing a blue pencil over a sheet of paper will appear in the top left corner of the field. Click this icon to access the field features as listed below.

Features
Field features can be edited by clicking on the orange field icon  when the presentation layer is displayed.
Field Label
- Field Setting - Display Alternate Label (affects this form only)
Grid Appearance
List Appearance
Tree Appearance
Tooltip
- Display Alternate Descriptive Text (affects this form only)
Block Association
Validation
Audit History
View Only
File Access
Drawing Options
Field Parts
The Drawing Field has 16 different field parts:
- Background Filename - The file name of the stored file containing the background image.
- Foreground Filename - The file name of the stored file containing the foreground image.
- Merged Filename - The file name of the stored file containing the merged image.
- Background File Size - The size of the background image file in bytes.
- Foreground File Size - The size of the foreground image file in bytes.
- Merged File Size - The size of the merged image file in bytes.
- Background Download URL - If the Drawing Field is set to allow public access to the file, this will be the URL where the stored background image file is found. If the Field is not set to allow public access, it will be a path to the image which will attempt to force the browser to download the file.
- Foreground Download URL - If the Drawing Field is set to allow public access to the file, this will be the URL where the stored foreground image file is found. If the Field is not set to allow public access, it will be a path to the image which will attempt to force the browser to download the file.
- Merged Download URL - If the Drawing Field is set to allow public access to the file, this will be the URL where the stored merged image file is found. If the Field is not set to allow public access, it will be a path to the image which will attempt to force the browser to download the file.
- Background Encoded File - A base64 encoded string containing the contents of the background image. This is cleared after it is saved into an image file.
- Foreground Encoded File - A base64 encoded string containing the contents of the foreground image. This is cleared after it is saved into an image file.
- Merged Encoded File - A base64 encoded string containing the contents of the merged image. This is cleared after it is saved into an image file.
- Height - The height of the merged image.
- Width - The width of the merged image.
- Mime Type - The Internet Media Type, will always be image/png
- Location Type - Will always be empty
Copying Field Parts to and from File Attachments in Actions
To copy a file attachment to a field part of a drawing field in an action, set either the “Download URL” or “Stored Value” part of the file attachment you are reading to either the “Background Download URL”, the “Foreground Download URL” or the “Merged Download URL” of the drawing field you want to set, and the file will copy in the background correctly. You can also set the “Stored Value” part of the file attachment to the “Full Field” of a drawing field and the file will automatically be set to the “Foreground Download URL” part for that field.
To copy a field part of a drawing field to a file attachment in an action, set either the “Background Download URL”, the “Foreground Download URL”, or the “Merged Download URL” part of the drawing you are reading to “Download URL” of the file attachment field you want to set, and the file will copy in the background correctly.
Saving a Field Part from a URL
If you have the URL to a file on the internet, you can use an action to push that URL into either the “Background Download URL”, the “Foreground Download URL”, or the “Merged Download URL” of the drawing field you want to set and that file will be downloaded and saved into that field part.
Using The wPaint Plugin
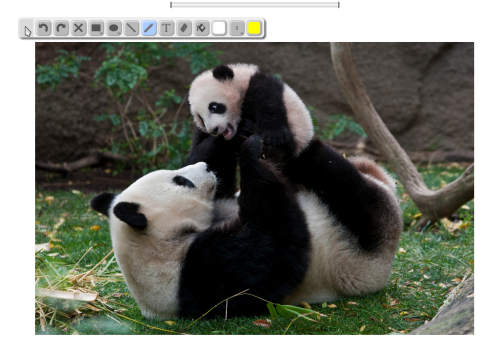
In non-editable mode, the field will display either the merged image, the background image, or the foreground image, with priority given in that order should one of more of those images not exist. In editable mode, the field will display a canvas using the field's height and width settings (or 400 if they are not set), showing the background image with the foreground image over top of it. If either image is too large for the canvas, it will be scaled down to fit. On the contrary, should both images be smaller than the dimensions of the canvas, the remaining area will be filled in with grey. 
The toolbar appears when the component has entered edit mode. It allows the application developer to select a desired action that will be performed in the canvas below.
- Handle - This allows the application developer to click and drag the toolbar to a new location.
- Undo - This undoes the last action performed.
- Redo - This redoes the last action undid.
- Clear - This clears out the entire foreground image (including anything that had been previously saved).
- Shapes 1 - This allows the application developer to create a shape on the canvas. By holding down the mouse button, they can change to one of these shapes: Rectangle, Rounded Rectangle, Square, Rounded Square, Diamond.
- Shapes 2 - This allows the application developer to create a shape on the canvas. By holding down the mouse button, they can change to one of these shapes: Elipse, Cirlce, Pentagon, Hexagon.
- Line - This allows the application developer to create a straight line on the canvas.
- Pencil - This allows the application developer to freely draw on the canvas.
- Text - This allows the application developer to place text on the canvas. They are also able to change the font size, font family and toggle the bold and italic modes.
- Eraser - This allows the application developer to erase parts of the foreground image (including anything that had been previously saved).
- Bucket - This allows the application developer to fill in an entire area with a single color.
- Fill Color - This allows the application developer to choose the color of the fill area by selecting an option from the color palette, entering a hexidecimal value in the text box, or by clicking the dropper and clicking again over an area of the foreground image to copy it's color.
- Stroke Width - This allows the application developer to change the size of the effect area for an action.
- Stroke Color - This allows the application developer to choose the color of the effect area for an action by selecting an option from the color palette, entering a hexidecimal value in the text box, or by clicking the dropper and clicking again over an area of the foreground image to copy it's color.