Fig. 1: Application Header
| To start configuring the Multi-Tenant Billing module, click the “Admin” link in the top right corner of the application header. |
 Fig. 2: Administration Menu
| Here you will see the application administration screen. Click on the “Edit Application Settings” link. Note: If you made changes to your administration menu prior to importing the billing module, the link may be located in a different location or missing all together. If that is the case, use the Presentation Layer to add the link. |
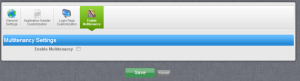 Fig. 3: Application Settings Page
| Under the “Enable Multitenancy” section of the Application Settings page, you will find the checkbox to enable multi-tenancy. If you have not done so previously, click on the enable multi-tenancy check box and save the Application Settings |
 Fig. 4: Administration Menu w/ Multi-Tenancy
| When you return to the application administration screen, you will notice a new section that contains the administration section for the billing module. |
 Fig. 5: Administration Menu w/ Multi-Tenancy
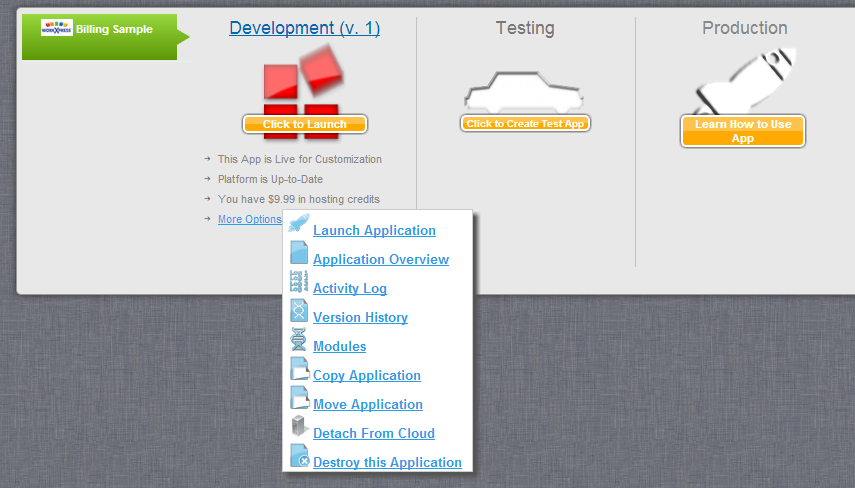
| Click on the “Edit My Settings” link in the center column of the multi-tenant billing form. This will take you to the multi-tenant configuration screen. This screen is broken down into four sections: Email Settings, Registration Settings, Payment Settings, and Misc Settings. All four sections must be filled out in order for the billing module to work properly. These settings are local to the installation must be filled out for every installation of the application: build, testing, and production. Because these settings are not linked to the application, they can be different for each installation and will not be overwritten when updates are performed. |
|
Fig. 5: Email Configuration
| The multi-tenant billing module will send emails to the end user when certain events occur. Each email template has five settings that must be filled in. The first two settings will create the From portion of an email. The “From Email Address” will be the address that is used for the “from” section, for example, donotreply@workxpress.com. The “From Name” will be a nicer-looking name attached to the email address, for example, “Do Not Reply.” These two settings will be combined in the form "Do Not Reply <donotreply@workxpress.com>". The third setting is the subject line of the email. The fourth setting is used in the basic template that comes included for each email type and is a header inside the email (this is commonly set to same value as the subject). The last setting is the report that is run and its result is the body of the email. For each email type, the billing module includes a standard report. These reports then can be edited to achieve a custom look. |
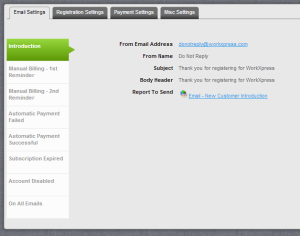 Fig. 12: Introduction Email Configuration
| The Introduction email is sent to the end user when they sign up for your application using the registration page. The pre-built report for the Introduction is titled “Email - New Customer Introduction”. |
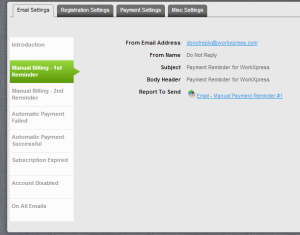 Fig. 13: Manual Billing - 1st Reminder Configuration
| The Manual Billing - 1st Reminder email is sent a specified number of days before an end user's payment is due when they are paying via manual means, such as by check. The pre-built report for the Manual Billing - 1st Reminder is titled “Email - Manual Payment Reminder #1.” |
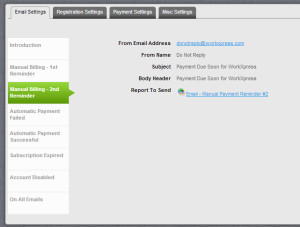 Fig. 14: Manual Billing - 2nd Reminder Configuration
| The Manual Billing - 2nd Reminder email is similar to the Manual Billing - 1st Reminder email in that it is sent a specified number of days before an end user's payment is due when they are paying via manual means. However, the 2nd Reminder email is intended to be a final reminder before it is too late for the end user to submit payment on time. The pre-built report for the Manual Billing - 2nd Reminder is titled “Email - Manual Payment Reminder #2.” |
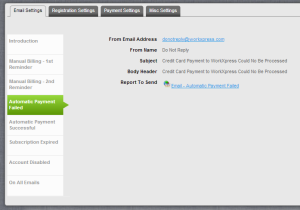 Fig. 15: Automatic Payment Failed
| The Automatic Payment Failed email is sent when the end user is paying via automatic means, such as by credit card, and the processing has failed. The pre-built report for the Automatic Payment Failed email is titled “Email - Automatic Payment Failed.” |
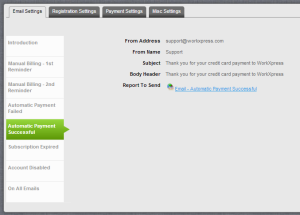 Fig. 16: Automatic Payment Successful
| The Automatic Payment Successful email is sent when the end user is paying via automatic means and the processing succeeded. The pre-built report for the Automatic Payment Successful is titled “Email - Automatic Payment Successful.” |
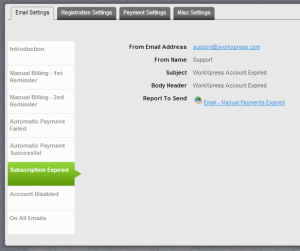 Fig. 17: Subscription Expired
| The Subscription Expired email is sent when the end user or an administrator has canceled the subscription to the application. The pre-built report for the subscription Expired email is titled “Email - Manual Payments Expired.” |
 Fig. 18: Account Disabled
| The Account Disabled email is sent when the end user is delinquent and access to the application is being removed. The pre-built report for the Account Disabled email is titled “Email - Account Shut Off.” |
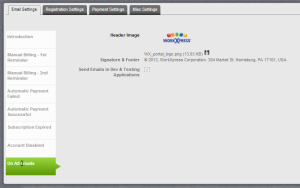 Fig. 19: General Email settings
| These settings apply to all the emails generated by the multi-tenant billing module. The first setting is an image to use as part of the standard email template. The second setting is a general footer to use as part of the standard email templates. The last setting tells the multi-tenant billing module whether it should actually send emails in development and testing environments. Sending emails using the default WorkXpress email system requires the account that the application is running to pay for emails sent, so emails should be turned off when the building and testing of the application does not require the sending of emails. |
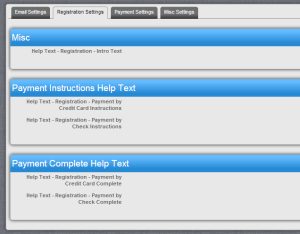 Fig. 20: Registration Settings
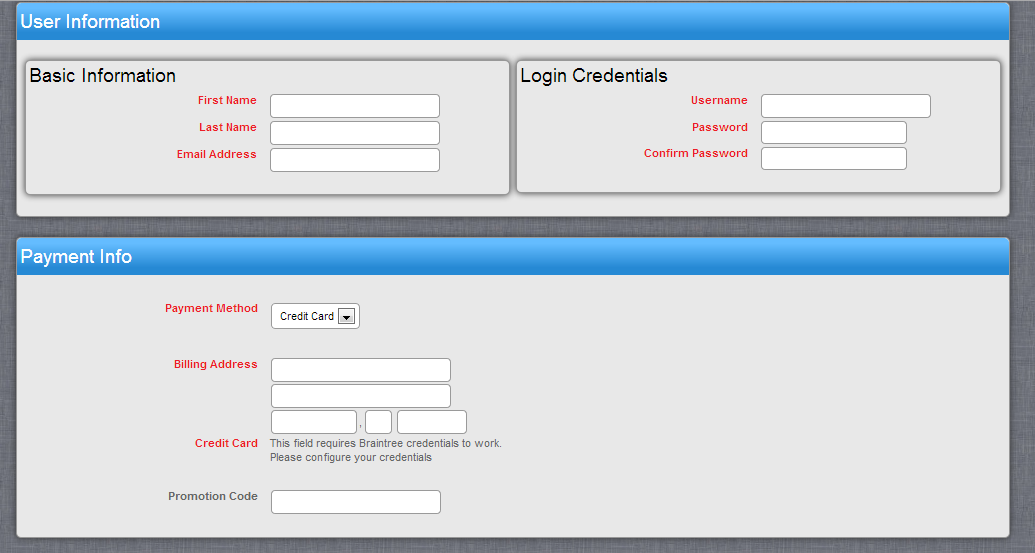
| On the default registration page, there are several areas that can be customized with html for explaining to end users about the registration process. Also on the default registration complete page there is a section for the builder to add content to thank the user for their payment or to explain the next steps of paying by check. |
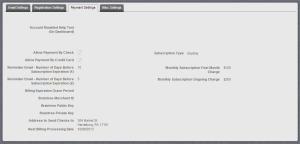 Fig. 21: Payment Settings
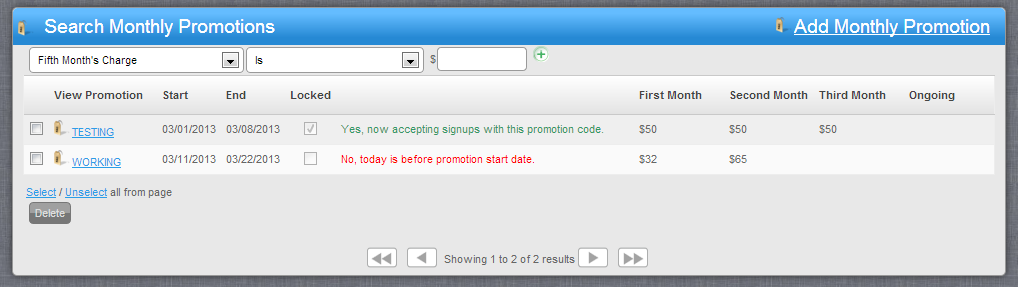
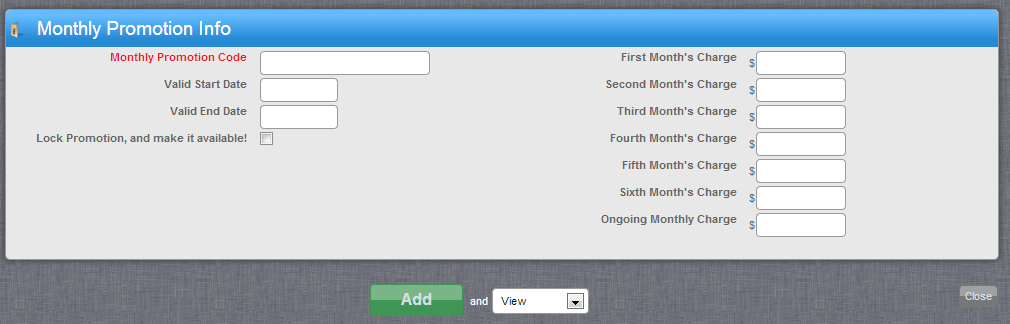
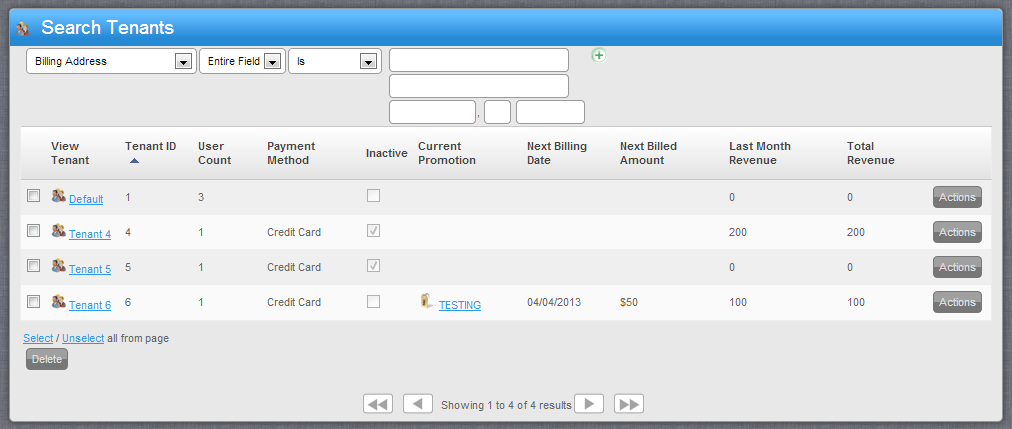
| The payment settings page allows the builder to configure how the end user will pay for the application and what the payment frequency will be. Until the payment options are registered, the end user can register for and use the application without payment. Reminder Email - Number of Days Before Subscription Expiration (1) and (2) are used for sending the Payment Reminder Emails when the end user pays by check. The Billing Expiration Grace Period is used in automatic payments and is the period of time given to the user to log in and update their billing information before a second and final attempt is made to charge the customer. The three Braintree settings are values that come from the builder's Braintree account. Braintree is the processing company where the multi-tenant billing module collects, stores, and charges credit cards. To sign up for Braintree, click here. When configuring a development or testing application, Braintree Sandbox credentials must be used. The same Sandbox credentials can be used for both development and testing. When configuring a production environment, Braintree Production credentials must be used. The Address to Send Checks to is used in the manual payment email templates. The next billing processing date is used to set when the nightly billing tasks, such as charging monthly or annual fees, are performed. When an application is installed, billing will not start automatically. The administrator must enter the date on which the billing process should begin. After the billing process has started, the date will automatically advance by one day after the current day's processing has started. If for some reason billing needs to be temporarily suspended, then this field can be cleared by the administrator. To restart billing, enter the date on which billing was last processed and the system will automatically process the back log. The subscription type determines whether the end user is charged monthly or annually for access to the application. For annual billing, a recurring fee is defined. For monthly billing, a default first month free and a default ongoing fee can be entered. Under the monthly billing system, promotions can be created to override the default values. |
 Fig. 22: Misc Settings
| The application login url setting is used by some of the email templates to define a login url. |
 Fig. 1: Application Header
 Fig. 2: Administration Menu
 Fig. 3: Application Settings Page
 Fig. 4: Administration Menu w/ Multi-Tenancy
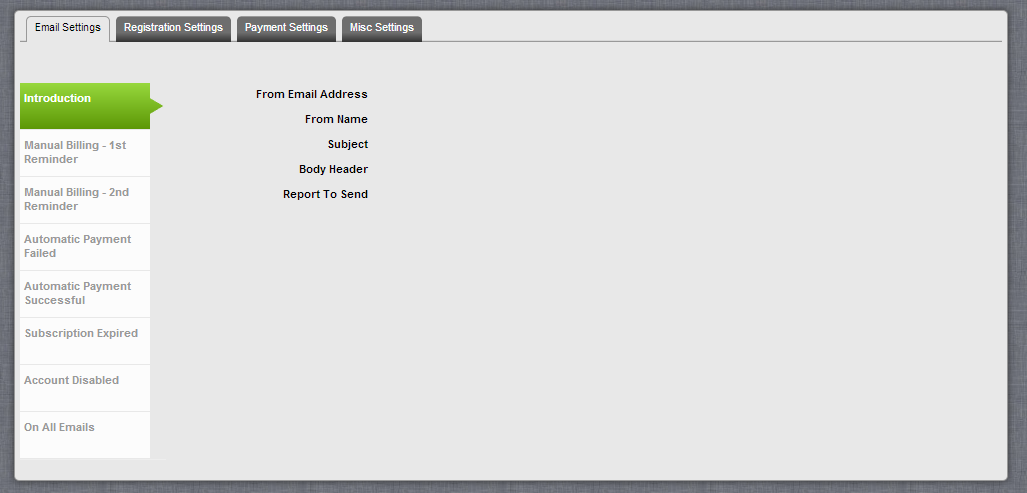 Fig. 5: Administration Menu w/ Multi-Tenancy
 Fig. 12: Introduction Email Configuration
 Fig. 13: Manual Billing - 1st Reminder Configuration
 Fig. 14: Manual Billing - 2nd Reminder Configuration
 Fig. 15: Automatic Payment Failed
 Fig. 16: Automatic Payment Successful
 Fig. 17: Subscription Expired
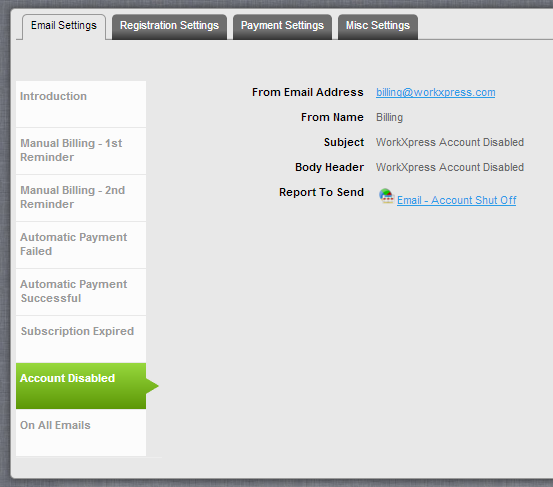 Fig. 18: Account Disabled
 Fig. 19: General Email settings
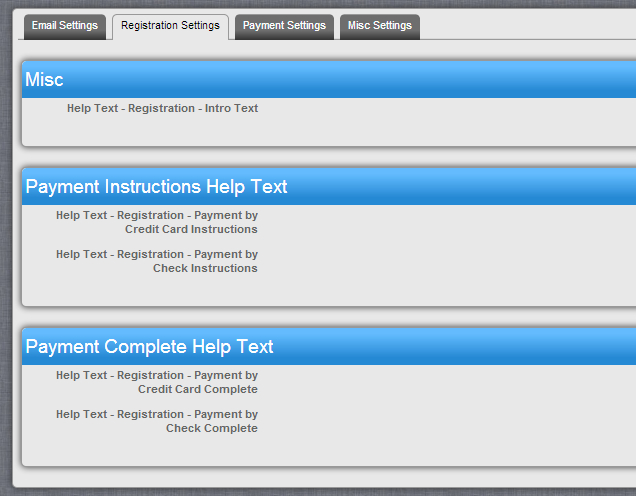 Fig. 20: Registration Settings
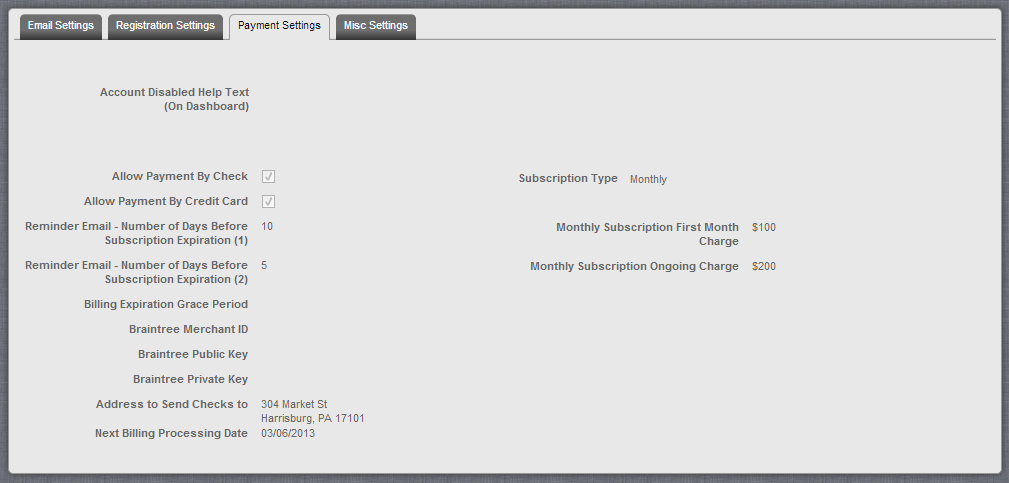 Fig. 21: Payment Settings
 Fig. 22: Misc Settings